

We have officially taken the leap and planted our very first pumpkin patch! To say we’re excited is an understatement, though we’re also buzzing with a healthy dose of first-timer nerves. It’s a grand experiment, and we’re inviting you to follow along on our journey. Wish us luck!
The Planting
We officially started our pumpkin journey on May 17th, a week after Mother’s Day. It felt like the perfect time to get our pumpkin and gourds (squash!) into the ground. After a couple of weeks of anxious waiting and watching, we saw our very first sprouts poke through the soil on June 1st! There’s nothing quite like seeing that first sign of life.
We might have gone a little overboard on the varieties, but how could we resist? Our patch is now home to a wild assortment of pumpkins and gourds. We’ve even given some of them silly nicknames:
- Jack-o-Lantern (aka “Average Joe” or “Orange Archie” since doggy Archie took a bite out of it)
- Rouge Vif D’Etampes (aka “Red Ralph”)
- Big Moon Pumpkin (aka “Moon”)
- Casper Pumpkin (aka “The Great White”)
- Turks Turban (love the name and the bright red color!)
- Baby-Boos (already a perfect name!)
- Jack Be Little (how could you change it?)
- Tiger Gourds (pretty mutant from mom B’s garden 🙂)
- Birdhouse Gourds (fun suggestion by a friend for fairy gardens🧚)
How to Plant Your Own Pumpkins
For anyone else inspired to start their own patch, here are the basic steps we followed:
- Source Your Seeds: We used a mix of store-bought seeds for new varieties and seeds we saved from last year’s pumpkins. To save seeds, we simply harvested them from a few of our favorite pumpkins, washed and dried them thoroughly, and then stored them in a cool, dry place (our fridge!) over the winter.
- Pick Your Spot: Pumpkins are sun-lovers! Choose a spot in your yard that gets at least 6-8 hours of direct sunlight each day. They also need a lot of space to spread out, as their vines can grow over 20 feet long.
- Prepare the Soil: Our helpful relatives tilled the patch for us! It’s best to have loose, well-drained soil. Pumpkins are also heavy feeders and need nutrient rich soil to thrive. Lucky for us the sheep have provided years of fertilization!
- Build Your Mounds: We planted our seeds in small hills or “mounds” of soil. This helps the soil warm up faster and ensures good drainage, which is crucial for preventing the seeds from rotting.
- Plant the Seeds: We planted 4-5 seeds in each mound, about one inch deep. Once the seedlings grew a few inches tall and developed their first true leaves, it is recommended to thin them out and keep only the strongest 2-3 plants.
- Water, Water, Water: Pumpkins are thirsty! They need consistent watering, especially during hot, dry weather. Water them deeply once or twice a week, focusing on the base of the plant to avoid getting the leaves wet, which can encourage mildew.
Patch Progress and Pests
It’s been a busy few weeks! We’ve been diligently tilling between the rows and pulling weeds by hand to keep the patch clear. Mother Nature has certainly helped with the watering—we’ve had a ton of rain lately. We’re a little worried about some of the lower-lying plants flooding out, but we’re keeping our fingers crossed.
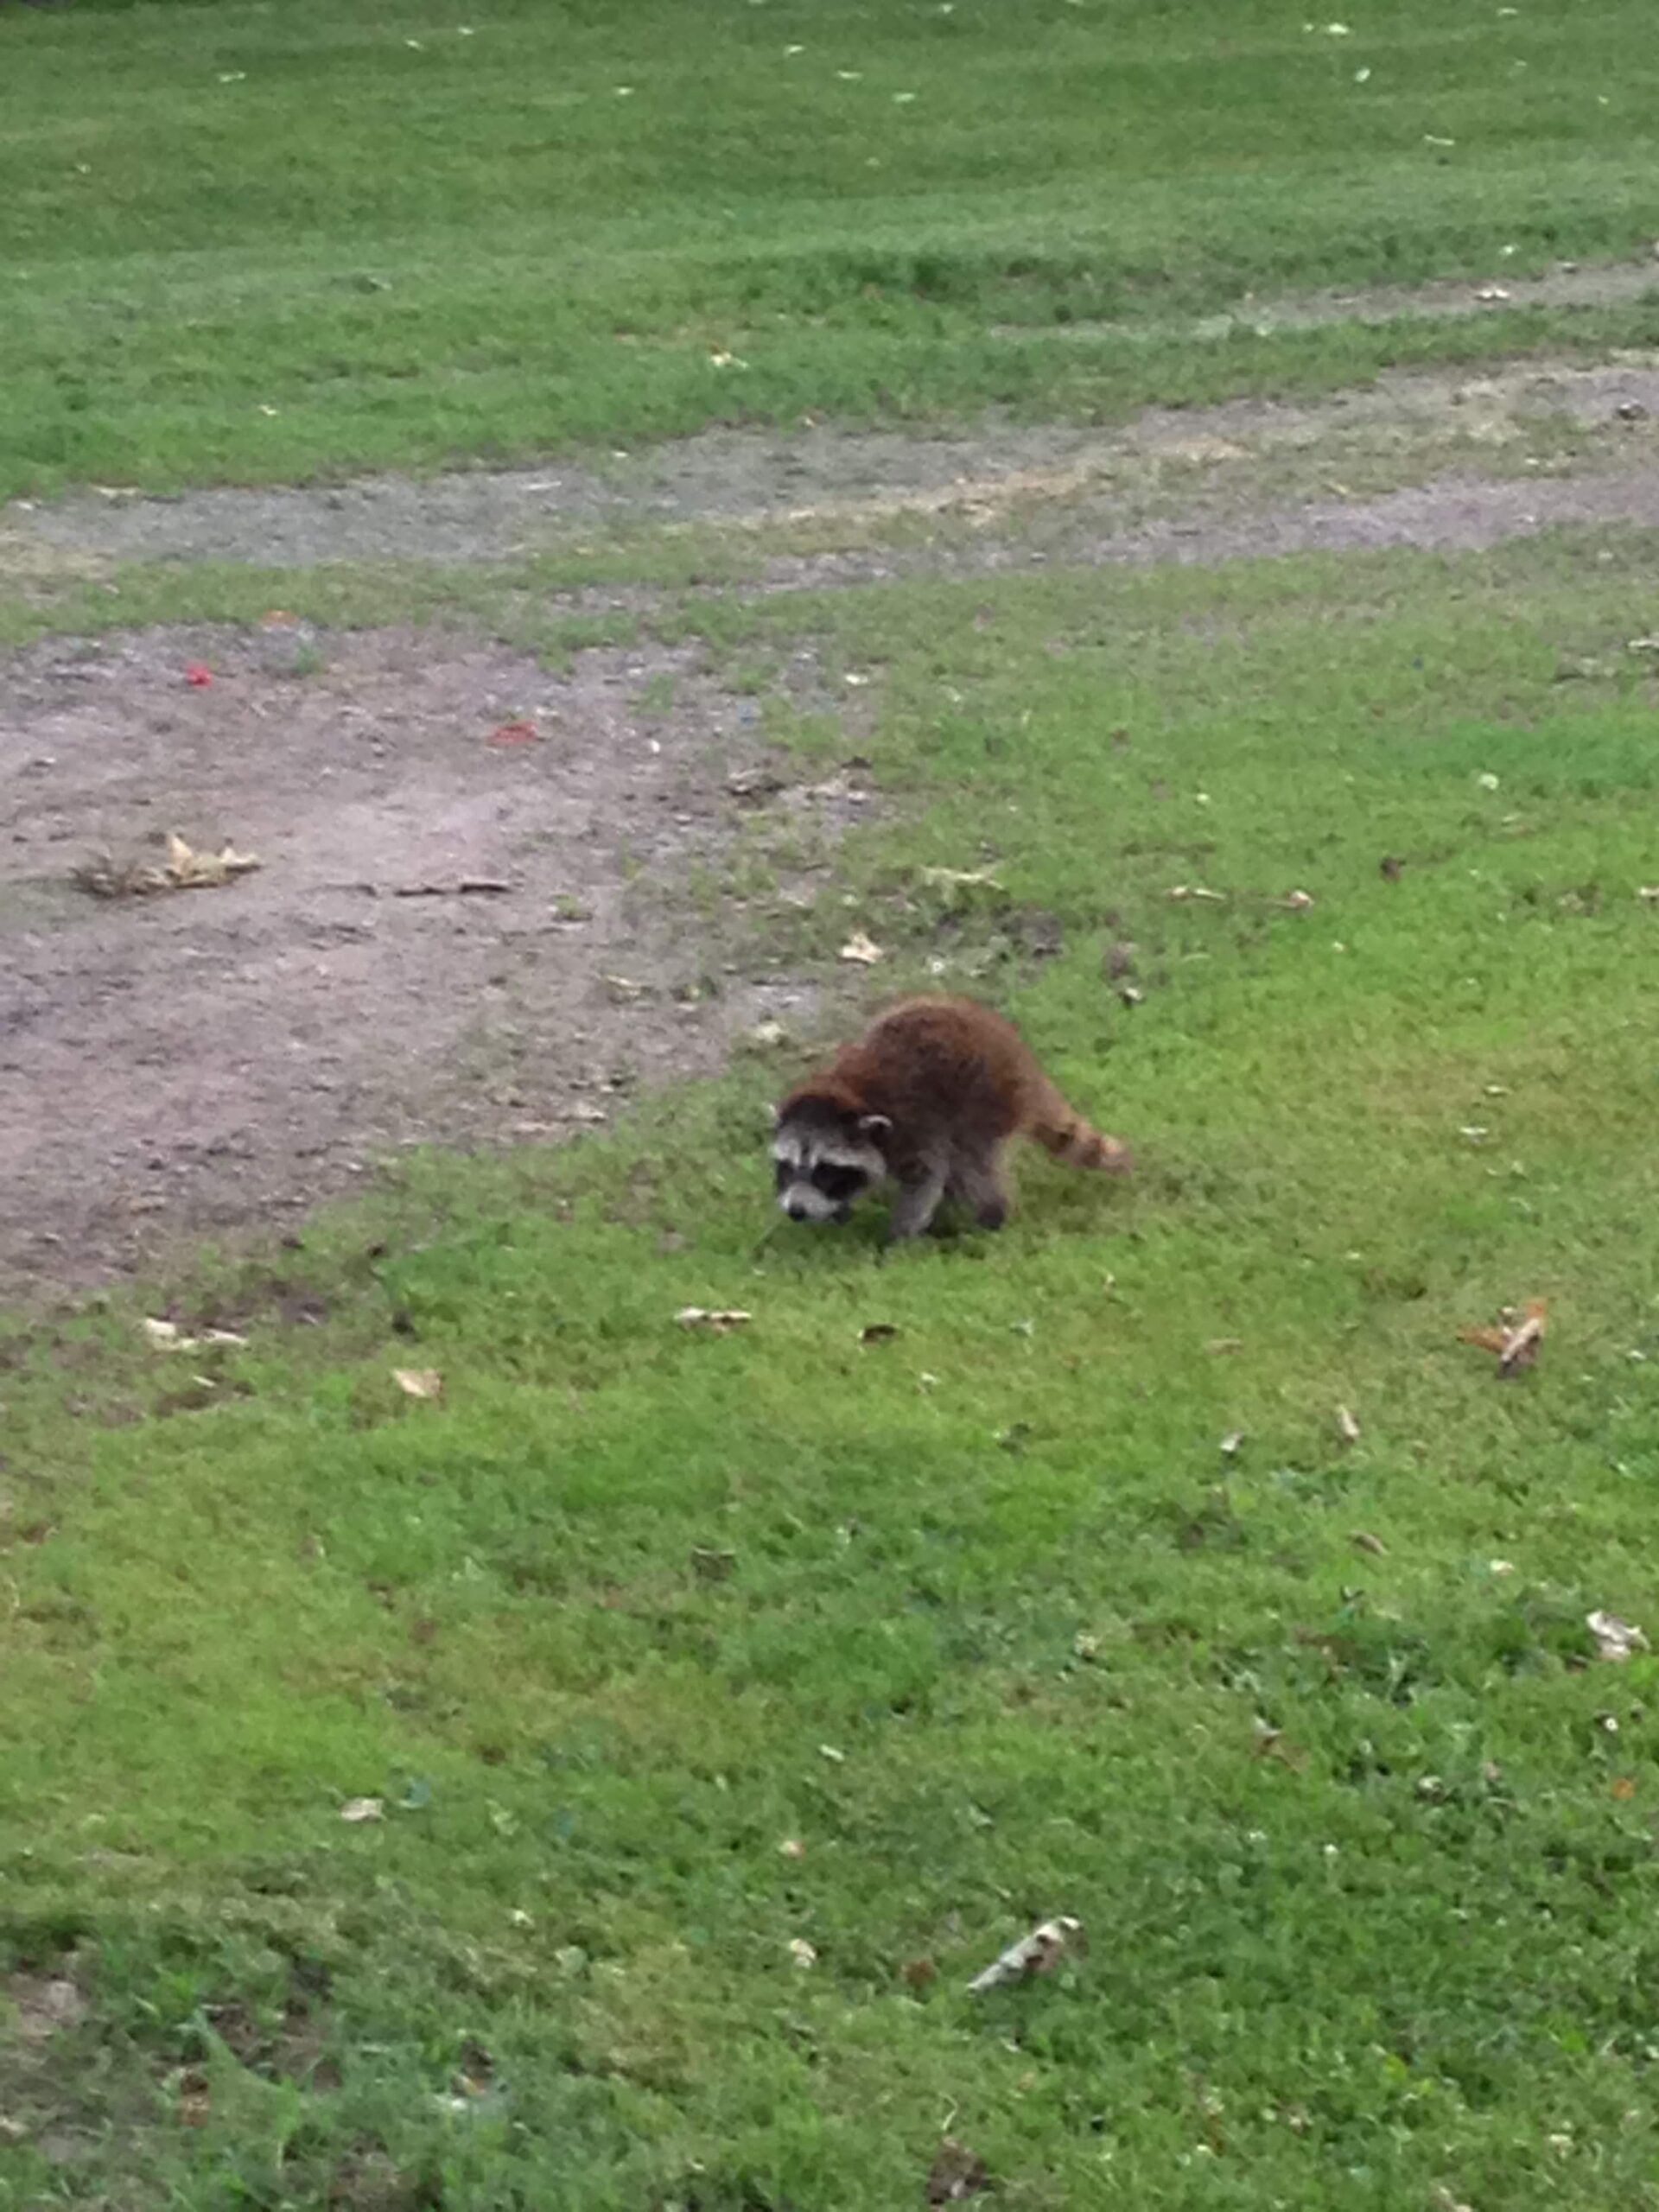
Of course, we’re not the only ones excited about the new growth. To keep the slugs and snails at bay, we’ve sprinkled a barrier of diatomaceous earth around our seedlings. Our biggest challenge, however, is the deer. To protect our patch, we’ve deployed a two-pronged defense: a large, inflatable wavy man to spook them and a liberal application of deer repellent spray. So far, so good!
We’ll keep you updated on our great pumpkin experiment. Here’s to hoping for a bountiful harvest this fall!
Sprouting: June 1st – 5th (15 Days or about 2 Weeks)


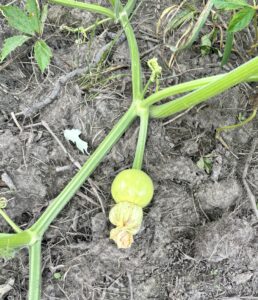
Our First Flower: July 11th (55 Days or about 8 Weeks)


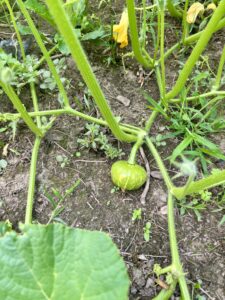
Our First Pumpkin! July 20th (64 Days or about 9 Weeks)

Leave a Reply